Do you think keeping a production environment up and running is an easy job?
Life without Kubernetes
Life with Kubernetes


Imagine This…
You’ve built a shiny new Web App. It handles requests, processes business logic through different services, maybe returns HTML pages so users can interact with it in their browsers, and of course, it’s backed by one or more databases.
Now comes the not-so-fun part: deployment.
You have to package each piece into Docker containers, run them on a server, and make sure everything is always up and running. If something crashes? You better notice fast and restart it manually.
What if one service gets overwhelmed? You’ll need to scale it up—spin up more copies to keep things running smoothly. And when it’s time to release a new version? You’ll need to update each container, making sure they all switch over without users noticing any hiccups.
Sounds like juggling a dozen flaming torches while riding a unicycle, right?
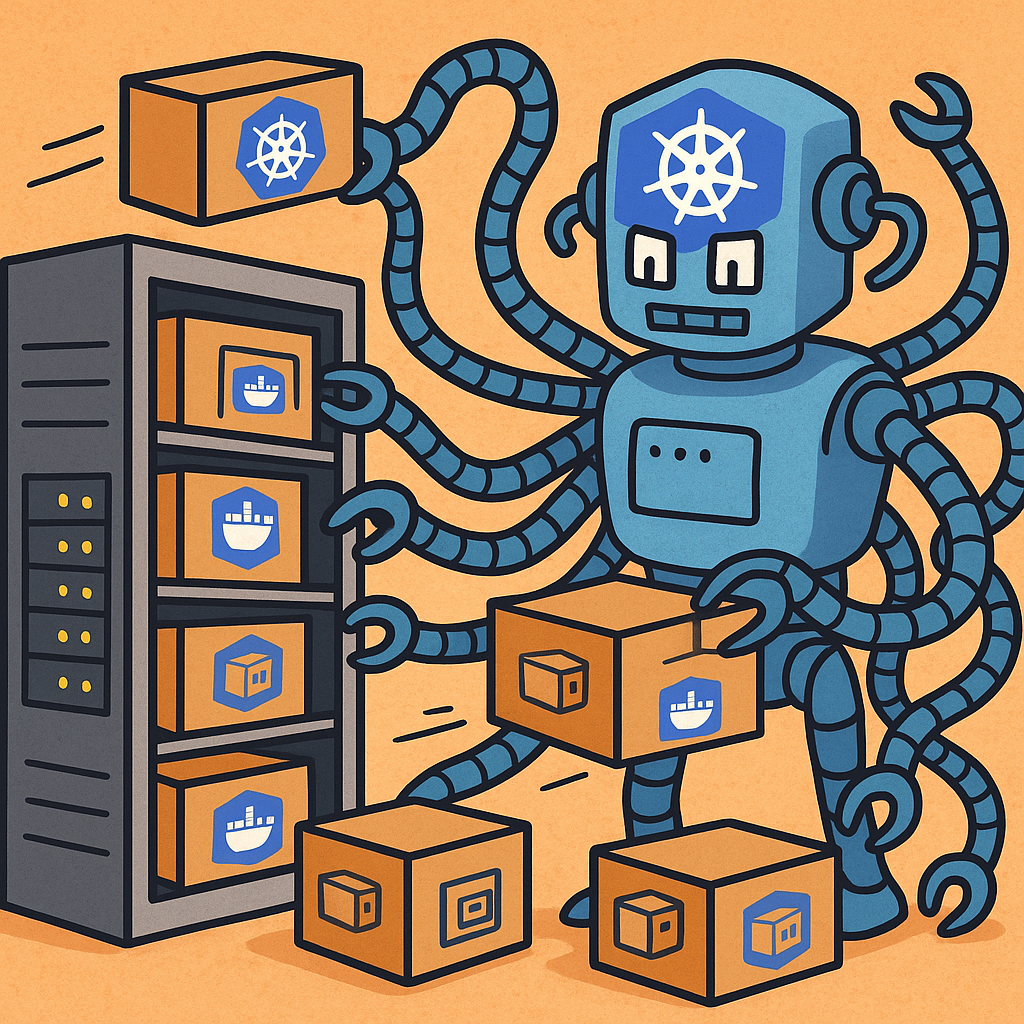
Enter the Multi-Armed Kubernetes Bot
Instead of doing all this manually, you can call in your robotic assistant: Kubernetes.
This powerful robot has dozens of arms—each one capable of handling a task for you. It watches over your app, makes sure everything stays healthy, restarts anything that fails, scales services automatically, and even performs smooth, interruption-free updates.
All it needs from you is a set of configuration files and a few shell commands. Then, it takes over the heavy lifting—no more manual restarts, scaling headaches, or update nightmares.
With Kubernetes, your Web App runs like a well-oiled machine—because now, it’s powered by a multi-armed robot.
Before the Arms Move: Get to Know the App Blueprint
Before our multi-armed Kubernetes Robot can start organizing and managing apps, we need to give it something to work with. That’s why we’ll build a small sample app — simple but powerful enough to help us understand key Kubernetes features.
This app will have two separate modules:
Module 1: Lucky Number Generator (Backend API)
This is a backend service that generates your lucky number of the day.
Key Features:
- Endpoint to get a lucky number:
It generates a random 4-digit number (e.g., 4627) but adds a 5-second delay before responding — perfect to simulate load and latency. - Health check endpoint (/ping):
Let us verify that the app is up and running.
Let check the Lucky Number Generator NodeJS code
app.js File
const express = require('express');

const app = express();
const PORT = process.env.PORT || 3001;

// Simulate startup delay
const startupDelay = async () => {
  console.log('App is starting... please wait');
  await new Promise(resolve => setTimeout(resolve, 5000)); // 5 seconds delay
  console.log('App2 is ready!');
};

function busyWait(ms) {
    const start = Date.now();
    while (Date.now() - start < ms) {
      // Do nothing — just keep checking time
    }
  }

app.get('/lucky', async (req, res) => {
  const podName = process.env.POD_NAME;
  console.log("Running on pod:", podName);

  console.log(`Received request for lucky number in pod ${podName}...`);

  // Simulate request processing time
  busyWait(5000); // 5 seconds delay

  const luckyNumber = Math.floor(10 + Math.random() * 90); // 2-digit number
  console.log(`Generated lucky number: ${luckyNumber} in pod ${podName}`);

  res.json({ luckyNumber });
});

app.get('/ping', (req, res) => {
  res.json({ status: 'ok' });
});

startupDelay().then(() => {
  app.listen(PORT, () => {
    console.log(`Server is running on port ${PORT}`);
  });
});
Module 2: Web App (Frontend Renderer)
This is a simple web server that renders a friendly HTML page showing the lucky number retrieved from the backend API.
Key Features:
- Fetches the lucky number from the lucky-number-app
- Renders a React server-side HTML page
- Checks that the lucky-number-app is available before starting up
Let check the Web App NodeJs code
server.js file
const express = require('express');
const React = require('react');
const ReactDOMServer = require('react-dom/server');
const fetch = require('node-fetch');
const LuckyPage = require('./component/LuckyPage.jsx').default;

const app = express();
const PORT = process.env.PORT || 4000;
const LUCKY_API_URL = process.env.LUCKY_API_URL || 'http://lucky-number-app/lucky';
const PING_URL = (LUCKY_API_URL.replace(/\/lucky$/, '/ping'));

async function checkLuckyNumberApp() {
  try {
    const res = await fetch(PING_URL, { timeout: 2000 });
    if (!res.ok) throw new Error('Ping failed');
    const data = await res.json();
    if (data.status !== 'ok') throw new Error('Ping returned unexpected status');
    return true;
  } catch (err) {
    console.error('Could not reach lucky-number-app /ping endpoint:', err.message);
    return false;
  }
}

app.get('/', async (req, res) => {
  try {
    const response = await fetch(LUCKY_API_URL);
    const data = await response.json();
    const html = ReactDOMServer.renderToString(<LuckyPage number={data.luckyNumber} />);

    res.send(`
      <!DOCTYPE html>
      <html>
        <head>
          <title>Your Lucky Number</title>
          <style>
            body { font-family: sans-serif; text-align: center; margin-top: 3em; }
            .number { font-size: 3em; color: #2b7a78; }
          </style>
        </head>
        <body>
          ${html}
        </body>
      </html>
    `);
  } catch (err) {
    console.error(err);
    res.status(500).send('Failed to fetch lucky number');
  }
});

checkLuckyNumberApp().then((ok) => {
  if (!ok) {
    console.error('Startup aborted: lucky-number-app is not reachable.');
    process.exit(1);
  }
  app.listen(PORT, () => {
    console.log(`Lucky Web App running on port ${PORT}`);
  });
});Now let check the LuckyPage.jsx file
const React = require('react');

function LuckyPage({ number }) {
  return (
    <div>
      <h1>Your Lucky Number</h1>
      <div className="number">{number}</div>
    </div>
  );
}

module.exports = { default: LuckyPage };Together, these two apps form a simple system that we’ll deploy and experiment with in Kubernetes. The lucky-number-app simulates backend load and failure, while the web app shows how services interact. As we continue, we’ll use them to explore concepts like service, scaling, restarting, and more — with our Kubernetes Robot managing it all behind the scenes.
So in summarize we are going to deploy this 2 apps like show in the follow diagram

You can see and get the whole project here: https://github.com/freddyDOTCMS/kubernates-beginners-examples
Powering Up the Robot: Creating the Kubernetes Cluster
Now that we’ve built our Lucky Number App, it’s time to deploy it—but wait! Before our robot can start placing boxes (a.k.a. running our app), we need a place to deploy it. That place is called a Kubernetes cluster.
You can think of the cluster as the rack where our robot operates—organizing, moving, and managing all the boxes with precision.
So, What Is a Kubernetes Cluster?
A Kubernetes cluster is a group of machines (called nodes) that work together to run containerized applications in a coordinated, scalable, and reliable way.
It’s made up of two main types of nodes:
Control Plane Node (a.k.a. Master Node)
This is the brain of the cluster. It handles all the decision-making, including:
- Keeping track of everything that’s running.
- Deciding where and when each app should run.
- Restarting your app if it crashes.
- Balancing the load between different nodes.
- Managing rolling updates and changes.
Worker Nodes (a.k.a. just Nodes)
These are the actual machines where your apps run. Each worker node includes:
- Kubelet: A small agent that talks to the control plane and makes sure the containers are running as expected.
- Container Runtime: Like Docker or containerd—it actually runs your app containers.
- Kube-proxy: Manages network traffic and load balancing so requests reach the right place.
Bringing the Robot to Life: Minikube in Action
So, how exactly did we create a Kubernetes cluster?, Well, to do that locally, we’re using Minikube — a tool that allows you to run a Kubernetes cluster on your personal computer. It’s perfect for:
- Learning how Kubernetes works
- Local development and testing
- Exploring Kubernetes features before using them in production environments
Let’s walk through the steps to create and run our first local cluster:
- Install Docker
- Install Minikube: To install Minikube, visit the official documentation: https://minikube.sigs.k8s.io/docs/start/
I’m using macOS, so to install Minikube I can simply run:
brew install minikube
- Install kubectl: it is the command-line tool used to communicate with our Kubernetes cluster.
Throughout this guide, we’ll use many kubectl commands to manage and inspect our cluster.
You can install kubectl by following the instructions here https://kubernetes.io/docs/tasks/tools/.
- List the Available Clusters: Run the following to see the clusters configured on your machine:
kubectl config get-clusters
In my case, I see several clusters, but if this is your first time, you’ll probably see just one — the minikube cluster.
- Start the Cluster: Now let’s start our cluster using:
minikube start –driver=docker
This will create a single-node Kubernetes cluster running locally. Also we are using docker as driver, it is really the default value but I want to make sure that we are going to use docker, the driver sets how our Kubernetes cluster is going to be run in your machine.
- Check the Created User: Minikube automatically sets up a user for your cluster. You can list the available users with:
kubectl config get-users
You should see something like minikube as a user.
- Look at the Available Contexts: The easiest way to connect to your cluster is through a context. Run:
kubectl config get-contexts
You’ll see that Minikube already created a context named minikube. A context is a combination of a cluster, a user, and a namespace. It tells kubectl which cluster to talk to and how.
- Connect Using the Context: To confirm you’re using the correct context, run:
kubectl config current-context
It should return minikube. If not, you can switch to it using:
kubectl config use-context minikube
- List the Nodes: Finally, let’s list the nodes in our cluster:
kubectl get nodes
You’ll see output like:
NAME STATUS ROLES AGE VERSION
minikube Ready control-plane 10m v1.33.1
But Wait… Where Are the Worker Nodes?
You might be wondering — You said before that exists 2 kind of nodes:
- Control Plane (Master)
- Worker Nodes
But here we see only one node!
That’s because Minikube uses a single-node cluster by default, where that one node acts as both the control plane and the worker. This makes it easier for local development and testing.
The Robot’s Toolbox: Understanding Images and Containers
Alright, so now we have our Kubernetes Cluster and at least one Node ready to run something. But… what exactly can we run inside a Kubernetes Node?
The answer is: pretty much anything.
Wait — are you saying that it doesn’t matter what technology I used to build my app? Whether it’s Node.js, Java, Python, Go, PHP, .NET, or even a mix of them?
Yes, you can run them all in Kubernetes.
But what makes this flexibility possible?
The secret is simple: Kubernetes doesn’t care about your language or framework — it only cares about containers.
So… What Is a Container?
A container is a lightweight, isolated, and portable environment that runs your application along with everything it needs — like:
- your source code
- the runtime (Node.js, Python, Java, etc.)
- system libraries
- configuration files
Think of it as a suitcase that holds your entire app, neatly packed and ready to go — whether on your laptop, on the cloud, or inside a Kubernetes cluster.
Unlike a virtual machine, a container doesn’t carry a full operating system — just the essentials.
Back to Our Example Apps
Remember our two apps?
- lucky-number-app — generates the lucky number
- lucky-web-app — shows the number in a web interface
We can create a container for each of them, deploy them in Kubernetes, and connect them so that the web app can get the number from the backend.
But let’s say we notice that lucky-number-app is a bit slow — it’s becoming a bottleneck. To fix that, we could spin up 3 or 4 more containers of the same app, so they can share the load.
Here’s the key:
All those containers must be identical — built exactly the same way and behave the same way.
That’s Where Images Come In
Think of it like this:
- Image = the recipe or blueprint
- Container = the actual instance running based on that recipe
For example:
Image steps:
- Install Node.js
- Install app dependencies
- Set up config
Container step:
- Run this command: npm start
So we can use the image to create any number of container that we want.
Tools to Build and Run Containers
There are many tools to build container images and run containers — like Docker, Podman, Buildah, etc.
And Kubernetes can run containers built with any of them — as long as they follow two standards defined by the Open Container Initiative (OCI):
- OCI Image Format — how images are built and stored
- OCI Runtime Spec — how containers are started and run from those images
In this post, we’ll use Docker to build our images and run our containers.
Feeding the Robot: How to Build and Run a Docker-Powered App
We’ll begin with the lucky-number-app. But before we create its Docker image, let’s walk through the steps required to build and run the app.
– Step 1: Install Node.js and npm
Our app is built using Node.js, so the first thing you need is to install Node.js on your system.
You can download it from the official site: https://nodejs.org/en/download
When you install Node.js, it also installs npm (Node Package Manager).
What is npm?
npm is the default package manager for Node.js. You can think of it as a helper tool that:
- Installs libraries (called packages or modules)
- Manages your app’s dependencies
- Runs useful scripts (like starting or testing your app)
You’ll use npm from the command line — we’ll see how in a moment.
– Step 2: Understand the App Structure And build the App
Here’s the file structure of the lucky-number-app:
lucky-number-app/
├── app.js

├── package.json

├── Dockerfile

├── .dockerignore

├── README.md
Let’s break this down:
- You can ignore Dockerfile and .dockerignore for now — we’ll use them when we build the Docker image.
- README.md just explains the project in Markdown format.
- The two most important files right now are:
- app.js: this contains our Node.js code (we reviewed this in a previous section).
- package.json: this file is like the blueprint of our project.
What is package.json?
The package.json file defines key information about your app. It tells npm and other tools:
- The app name and version
- A description
- The main file to run
- What dependencies it needs
- Scripts to start or test the app
- And more
Here’s what it looks like for our app:
{

    "name": "lucky-number-app",
    "version": "1.0.0",
    "description": "A simple lucky number generator with startup and request delay",
    "main": "app.js",
    "scripts": {
      "start": "node app.js"
    },
    "dependencies": {
      "express": "^4.18.2"
    }
}Let’s break it down:
- The top fields (name, version, description, main) describe the app.
- The scripts section defines command shortcuts. For example, running npm start will actually run node app.js. to start our App.
- The dependencies section lists the packages our app needs. In this case, just one: express.
– Step 3: Run npm install in the command line, when we run npm install, all dependencies will be downloaded into a folder called node_modules.
– Step 4: Start the app by running:
npm start
That’s it!
What About the lucky-web-app?
The steps are almost the same because it’s also a Node.js app. The only real difference is in the package.json — it has different dependencies, like React, because it renders HTML components using React.
Everything else — installing Node.js, running npm install, and starting the app — works the same way.
Now let come back to the Dockerfile
As we discussed earlier, an image contains all the steps and ingredients needed to build our App, while a container is a running instance of that image. So, for the container to know how to run and build our App, we define everything it needs inside a Dockerfile (remember that?).
Let’s take a look at the Dockerfile for the lucky-number-app:
# Use official Node.js LTS image
FROM node:18

# Set working directory
WORKDIR /app

# Copy package files and install dependencies
COPY package*.json ./
RUN npm install

# Copy the rest of the source code
COPY . .

# Expose port used by Express
EXPOSE 3001

# Start the app
CMD ["npm", "start"]Let’s break it down step by step:
- FROM node:18
We’re starting from an official Node.js image, version 18. This gives us Node.js and npm already installed — like inheriting a working environment. - WORKDIR /app
This sets /app as the working directory inside the container. Any command that follows (like copy or install) will happen in this directory. Remember, the container has its own file system, like a lightweight virtual machine. - COPY package*.json ./ and RUN npm install
First, we copy the package.json and package-lock.json files. Then we run npm install to download all required dependencies — creating a fresh node_modules folder inside the container. - COPY . .
This copies the rest of the project files into the container (like app.js). However, we usually want to exclude certain files, like node_modules from our local machine or the Dockerfile itself. That’s why we use a .dockerignore file. - EXPOSE 3001
This tells Docker that the app inside the container will be listening on port 3001. This is only for internal documentation purposes — we still need to explicitly map ports when running the container. - CMD [“npm”, “start”]
This is the actual command that runs when the container starts — it launches our app.
This entire file is what Docker uses to build our image, and the CMD line at the bottom is what tells the container how to start the app once it’s running.
The Dockerfile for the lucky-web-app is almost identical — it installs Node.js, copies the app files, installs dependencies, and starts the server. You can reuse the same structure.
Building and Running the Images
Now let’s see how we build and run these apps as Docker images. Make sure Docker is installed first.
To build the image for lucky-number-app, go into the /apps/lucky-number-app folder and run:
docker build -t kubernates-example/lucky-number-app .
- kubernates-example/lucky-number-app is the tag for the image. It’s split into:
- Namespace: kubernates-example
- App name: lucky-number-app
- The . at the end tells Docker to use the current folder as the build context.
You can list your local images with:
docker images
To build the lucky-web-app, do the same in the folder /apps/lucky-web-app:
docker build -t kubernates-example/lucky-web-app .
Now, to create the container we need to run:
docker run -p 3001:3001 kubernates-example/lucky-number-app
… and …
docker run -p 4000:4000 -e LUCKY_API_URL=http://host.docker.internal:3001/lucky kubernates-example/lucky-web-app
-p is to expose the port. Why do we need to set the port twice? The first port is for our local machine, and the second is the port inside the container. In this case, we’ll keep them the same to keep things simple.
We need to set here the LUCKY_API_URL variable to tell the lucky-web-app where it is going to find the lucky-number-app, but what is host.docker.internal?, well this is the host that is running our container. This means our localhost, but our lucky-web-app is running inside the Container and their localhost is the Container.
This will start both apps locally. The lucky-number-app will be available at http://localhost:3001, and the web app at http://localhost:4000.
Let check how all this work in the next video:
At This Point…
We’ve successfully:
- Built Docker images for both apps
- Run them locally using Docker
So we already have this deploy:

But — and this is important — they are not running inside a Kubernetes cluster yet.
That’s our next goal.
The Robot Picks It Up: What Is a Pod and How It Runs Our App
So far, we’ve seen our app running—but outside Kubernetes. Now it’s time to move it inside the cluster, just like we saw in the diagram below:

To run a container inside a Kubernetes Cluster, we need to wrap it inside a Pod.
What is a Pod?
In our robot factory metaphor, a Pod is like a box that our robot (Kubernetes) picks up, moves around, and takes care of.
It is the smallest unit of work in Kubernetes and usually contains:
- One or more containers (though typically just one)
- All running on the same node
- Sharing the same:
- Network (they all share the same IP address)
- Storage (if volumes are defined)
- Configuration (like environment variables)
Creating Our First Pod: lucky-number-app
To run our app, we first need to create a Pod configuration file. Here’s the YAML file for our backend app:
lucky-numer-app.yaml file
apiVersion: v1
kind: Pod
metadata:
  name: lucky-number-app
  labels:
    app: lucky-number
    tier: backend
spec:
  containers:
    - name: lucky-number-app
      image: kubernates-example/lucky-number-app:latest
      imagePullPolicy: Never
      ports:
- containerPort: 3001Let’s Break It Down
- apiVersion: v1
This tells Kubernetes what version of the API we’re using for this object. For Pods, v1 is the correct version. - kind: Pod
We’re creating a Pod object. - metadata
- name: the name of our Pod.
- labels: key-value pairs to help organize and group Pods later (useful for filters, services, etc).
- spec.containers
Here we define the container(s) inside this Pod.- name: name of the container.
- image: the container image to run.
- imagePullPolicy: Never: because we’re using a local image, we can push our image to the docker hub, but to keep the thing simple we are going to use just local image.
- ports: expose port 3001 (used by our app).
Can We Add More Containers?
Yes! A Pod can hold multiple containers. For example:
…

spec:
 containers:
      - name: lucky-number-app
        image: kubernates-example/lucky-number-app:latest
        imagePullPolicy: Never
        ports:
          - containerPort: 3001
      - name: lucky-web-app
        image: kubernates-example/lucky-web-app:latest
        imagePullPolicy: Never
        ports:
          - containerPort: 4001
…But in our case, we want to run these two apps in separate Pods, so let’s create another Pod file.
Creating the Second Pod: lucky-web-app
Here’s the YAML for our frontend Pod:
lucky-web-app.yaml file
apiVersion: v1
kind: Pod
metadata:
  name: lucky-web-app
  labels:
    app: lucky-web
    tier: frontend
spec:
  containers:
    - name: lucky-web-app
      image: kubernates-example/lucky-web-app:latest
      imagePullPolicy: Never
      ports:
        - containerPort: 4000
      env:
        - name: LUCKY_API_URL
value: http://lucky-number-app-service:3001/lucky Note the differences:
- Different name: both for the Pod and container.
- Different image: using the frontend app image.
- Different tier label: we label this one as frontend to distinguish it from the backend.
- Setting the LUCKY_API_URL variable to be equals to http://localhost:3001/lucky, it tells where to find the lucky-number-app.
Deploying the Pods
To create the Pods, run the following commands:
kubectl apply -f lucky-number-app.yaml
kubectl apply -f lucky-web-app.yaml
To list all the Pods run:
kubectl get pods
You should see both Pods listed.
Here you can see a video where the both Pods are created
So how you can see in the video the lucky-web-app is not reaching the lucky-number-app, so right now we have the follow:

… And that is not what we want, right? So let’s see how we can fix it.
Connecting the Dots: Making Our Pod Reachable Through a Service
Let’s start from the beginning: why can’t our two Pods talk to each other?
In our lucky-web-app Pod, the environment variable LUCKY_API_URL is set to:
http://localhost:3001/lucky
Or in the video example to (how you can see in the error message):
http://lucky-number-app:3001/lucky
But either way, the result is the same—it doesn’t work. Why?
Because each Pod in Kubernetes has its own network namespace, and localhost (127.0.0.1) refers only to the current Pod, not another one. So for this setup to work, both containers would need to be running inside the same Pod, which they are not.
How to Find the Pod’s IP
You can get the IP of the lucky-number-app Pod using:
kubectl get pod lucky-number-app -o wide
Example output:
NAME               READY   STATUS    RESTARTS   AGE   IP
lucky-number-app   1/1     Running   0          39h   10.244.0.13
You could now hardcode this IP in the LUCKY_API_URL, and the connection would work. BUT, if the Pod is ever deleted and recreated (which happens often), the IP will change.
That’s why we need a stable way to reach our Pod. This is where Kubernetes Services come in.
Introducing Services: The Static Entry Point
A Service in Kubernetes gives your Pods a stable network identity, even if their IPs change. It acts like a fixed gateway to access one or more Pods.
There are several types of Services in Kubernetes. For now, we’ll use the default one: ClusterIP. It makes the Service accessible within the cluster, which is exactly what we need.
Creating the Service
Let’s create a Service for the lucky-number-app Pod. Here’s the YAML file:
lucky-numer-app-service.yaml file
apiVersion: v1
kind: Service
metadata:
  name: lucky-number-app-service
spec:
  selector:
    app: lucky-number
    tier: backend
  ports:
    - protocol: TCP
      port: 3001
targetPort: 3001Breakdown:
- apiVersion: it is still v1 for services
- kind: This is the kind of Kubernates Object that we want to create in this case a Service,
- metadata: allow us to set the name of the Service, in this case lucky-number-app-service
- selector matches the labels in the Pod so the Service knows which Pods to route to.
To explain better, let’s check the metadata section in our lucky-number-app Pod yaml file:
metadata:
  name: lucky-number-app
  labels:
    app: lucky-number
tier: backendSo, the selector must match the labels set in this metadata section in the pod.
- ports:
- port: The port the service will expose.
- targetPort: The port in the container.
In this case, we’ll keep both ports the same to keep things simple.
To apply the service, you need to run:
kubectl apply -f lucky-number-app-service.yaml
Updating the lucky-web-app Pod
Now, go to the lucky-web-app.yaml file. To update the variable environment value, originally, it looked like this:
env:
- name: LUCKY_API_URL
value: "http://localhost:3001/lucky"We need to update it to:
env:
- name: LUCKY_API_URL
value: "http://lucky-number-app-service:3001/lucky"Why this name? Because in Kubernetes, the DNS name of a Service is its own name, and Kubernetes handles resolving the name even if the underlying Pod’s IP changes.
Now delete and recreate the Pod to apply the new env variable:
kubectl delete pod lucky-web-app
kubectl apply -f lucky-web-app.yaml
Checking the Logs
Let’s verify if everything is running, let check the logs running the follow command:
kubectl logs lucky-web-app
Expected output:
> [email protected] start
> babel-node server.js
Lucky Web App running on port 4000Success! Now your lucky-web-app Pod can reach the lucky-number-app Pod via the Service.
That is!!!!, now the lucky-web-app can reach the lucky-number-app Pod, so let go to the browser and let hit the http://localhost:4000 URL, AAAAAAANNNNDDDD we are going to get a 404, WAIT!!!, WHAT?!!!!!!
This is because we still are not able to reach the lucky-web-app Pod.
Let the Outside In: Exposing the Web Pod
Now that our lucky-web-app is running, we want to access it from outside the Kubernetes cluster — for example, using a browser. For this, we can’t use the default ClusterIP service (which only works inside the cluster). Instead, we’ll use a different service type: NodePort.
Step 1: Create the NodePort Service YAML
Let’s create a new service definition in a file named lucky-web-app-service.yaml:
apiVersion: v1
kind: Service
metadata:
name: lucky-web-app-service
spec:
type: NodePort
selector:
app: lucky-web
tier: frontend
ports:
- protocol: TCP
port: 4000
targetPort: 4000
nodePort: 30000What’s Different from the ClusterIP Version?
- name: Now it’s called lucky-web-app-service.
- type: This is important! We’re explicitly setting it to NodePort because we want to expose the service outside the cluster. If we didn’t include this, it would default to ClusterIP, which is internal only.
- selector: These values match the labels on the lucky-web-app Pod:
metadata:
name: lucky-web-app
labels:
app: lucky-web
tier: frontendSo this service knows which pod to route traffic to.
- ports:
- port: → the port the service exposes inside the cluster.
- targetPort: → the port in the container (same as before).
- nodePort: → this is the external port on the Node (must be between 30000 and 32767) that will be open to the outside world.
Step 2: Apply the Service
Now apply the configuration with:
kubectl apply -f lucky-web-app-service.yaml
Step 3: Access the App from the Browser
Now we want to access the service in our browser. But first, we need to know the Cluster IP address running:
minikube ip
❗ Important Note:
As we are using Docker as the Minikube driver (which is the default on many systems), then Minikube is actually running inside a Docker container. That means the IP returned by minikube ip won’t be directly accessible from your host system.
Alternative: Create a Tunnel
To make the NodePort accessible from your host machine, use the minikube service command, which will automatically open a tunnel:
minikube service lucky-web-app-service
This will:
- Start a tunnel if needed
- Open the correct browser URL
- Let you access the lucky-web-app from your browser as expected ✅
See It in Action
Let’s see this entire process in the video!
So let now update our diagram, we have:

So, we’re done… right?
Not exactly. Our app is running, but there’s a problem — it’s not scaled yet. If one of our pods goes down, we’d have to restart it manually.
That’s not very practical. Let’s take a look at another Kubernetes object that gives us scaling and self-healing superpowers.
Robot, We Need More Boxes! Scaling with ReplicaSets
Up until now, we’ve had just one Pod per app—not very exciting, right?
But here’s the problem: what happens if one of them becomes a bottleneck?
In fact, the lucky-number-app is already a bottleneck. Remember, we intentionally added a 5-second delay for each request to the /lucky endpoint. This isn’t a simple wait—it’s a CPU-consuming delay, simulating a complex and resource-heavy calculation (after all this is a lucky number is not like we are just calculating a random number).
Because this calculation hogs the CPU for 5 seconds, the Pod can’t handle any other requests during that time. If a second request comes in before the first one finishes, it will have to wait its turn.
Now, imagine if we had multiple Pods running lucky-number-app. The first request could be handled by Pod A, the second by Pod B, and so on—avoiding the bottleneck. Sure, we could manually start three extra Pods, but there’s a much better way: using a ReplicaSet.
A ReplicaSet ensures we always have the desired number of Pods running. If one crashes, Kubernetes automatically spins up a replacement as quickly as possible.
Performance Test Before ReplicaSet
Let’s test the current setup with Apache Benchmark (ab) running:
ab -n 12 -c 4 http://localhost:51026/
- -n 12 → send 12 requests in total
- -c 4 → send 4 requests at the same time
- http://localhost:51026/ → the tunnel URL for my local app
Results (before ReplicaSet):
Time per request: 20006.211 [ms] (mean)
Time per request: 5001.553 [ms] (mean, across all concurrent requests)On average, each request took 20 seconds. Ouch.
Creating the ReplicaSet
Here’s the lucky-number-app-rs.yaml file:
apiVersion: apps/v1
kind: ReplicaSet
metadata:
name: lucky-number-app-rs
spec:
replicas: 4
selector:
matchLabels:
app: lucky-number
tier: backend
template:
metadata:
  name: lucky-number-app
  labels:
    app: lucky-number
    tier: backend
spec:
containers:
- name: lucky-number-app
image: kubernates-example/lucky-number-app:latest
imagePullPolicy: Never
ports:
- containerPort: 3001
env:
- name: POD_NAME
valueFrom:
fieldRef:
fieldPath: metadata.name Breaking it down:
- apiVersion: apps/v1 → required for ReplicaSets.
kind: ReplicaSet → defines this resource type.
metadata.name → name of the ReplicaSet. - spec.replicas → number of Pods to run (4 in this case).
selector.matchLabels → identifies which Pods the ReplicaSet manages. If Pods with these labels already exist, they’ll be brought under this ReplicaSet’s control.
template → the Pod definition. Almost identical to our original lucky-number-app Pod YAML, but without apiVersion and kind. - Added an environment variable (POD_NAME) so the app can print which Pod handled each request.
Deploying the ReplicaSet:
kubectl apply -f lucky-number-app-rs.yaml
Performance Test After ReplicaSet
After deploying, we run the same ab test:
Time per request: 8390.674 [ms] (mean)
Time per request: 2097.668 [ms] (mean, across all concurrent requests)
Much better! And maybe we could improve further by scaling the lucky-web-app too.
Next, let’s see all this in action in the following video.
No Downtime Allowed: Smooth App Upgrades with Deployments
Okay, everything so far is great — but what happens when we need to upgrade our app?
Let’s take our lucky-number-app as an example. We currently have 4 Pods running.
Do we have to update each one manually, one by one?
Or is there a better way?
Even more importantly — wouldn’t it be great if we could upgrade our Pods without any downtime so that our app stays available while the upgrade happens?
That’s where Deployments come in.
What’s a Deployment?
In Kubernetes, a Deployment is like your robot’s mission plan — it tells Kubernetes what app to run, how many copies to keep, and how to update them without downtime.
It’s a higher-level controller that manages ReplicaSets (and through them, Pods) for you.
Instead of manually creating Pods or ReplicaSets, you describe your desired state in a Deployment YAML file, and Kubernetes does the heavy lifting.
What a Deployment does for you:
- Keeps the right number of Pods running
If a Pod crashes or a node goes down, Kubernetes will replace it automatically. - Handles rolling updates
You can update your app’s image version (or any Pod spec) without downtime — old Pods are replaced gradually with new ones. - Supports rollbacks
If an update goes wrong, you can easily revert to a previous version. - Abstracts away ReplicaSets
You don’t need to manage ReplicaSets directly — the Deployment creates and updates them for you.
Creating our Deployment
Let’s create a Deployment for the lucky-number-app.
lucky-number-app-deployment.yaml
apiVersion: apps/v1
kind: Deployment
metadata:
  name: lucky-number-app-deploy
spec:
  replicas: 4
  selector:
    matchLabels:
      app: lucky-number
      tier: backend
  template:
    metadata:
      name: lucky-number-app
      labels:
        app: lucky-number
        tier: backend
    spec:
      containers:
        - name: lucky-number-app
          image: kubernates-example/lucky-number-app:4-digets
          imagePullPolicy: Never
          ports:
            - containerPort: 3001
          env:
            - name: POD_NAME
              valueFrom:
                fieldRef:
                  fieldPath: metadata.name
This looks very similar to our ReplicaSet config — the main difference is the kind: Deployment and the updated image tag (4-digets instead of latest).
Apply it:
kubectk apply -f lucky-number-app-deployment.yaml
Upgrading our App
Let’s see how Deployments make upgrades simple.
- Step 1 – Build the current image: We need to create the 4-digests Image, running the follow command in the lucky-number-app folder:
docker build -t kubernates-example/lucky-number-app:4-digets .
- Step 2 – Make a change in the code: Let change the code to calculate 2 Digests lucky number so
In app.js, the lucky number generator currently is:
const luckyNumber = Math.floor(1000 + Math.random() * 9000);Let’s change it to generate a 2-digit number instead:
const luckyNumber = Math.floor(10 + Math.random() * 90);- Step 3 – Build the new image: Running the follow command in the lucky-number-app folder
docker build -t kubernates-example/lucky-number-app:2-digets .
- Step 4 – Update the Deployment YAML: Change the image in the YAML file:
...
containers:
  - name: lucky-number-app
    image: kubernates-example/lucky-number-app:2-digets
    magePullPolicy: Never
...- Step 5 – Apply the update: running the apply command:
kubectl apply -f lucky-number-app-deployment.yaml
The Magic: Zero Downtime
Kubernetes will roll out the new version by replacing Pods one at a time.
This means:
- Some Pods keep serving the old version
- Others start running the new version
The app stays up and running the whole time
No downtime. No manual restarts. No stress.
Let see it working in the next video:
What’s Next?
I know what you’re thinking — this is all great, but…
- How can we manage all these files without going crazy? Do I really need to do everything manually?
- What if we want to run Kubernetes in a development environment?
- How can we keep track of everything and monitor it properly?
- Can I use different profiles for different environments?
These are excellent questions — and big ones, too. Each deserves its own deep dive.
So stick around… we’ll be exploring all of this very soon!